Quick Start
What is AirSmart?
Unboxing
Thank you for choosing AirSmart. We really hope you will be delighted with your air quality monitor, and that it will help you to make your teaching space a safe and comfortable environment for both teacher and students.
Inside your AirSmart Edu air quality monitor, you will find
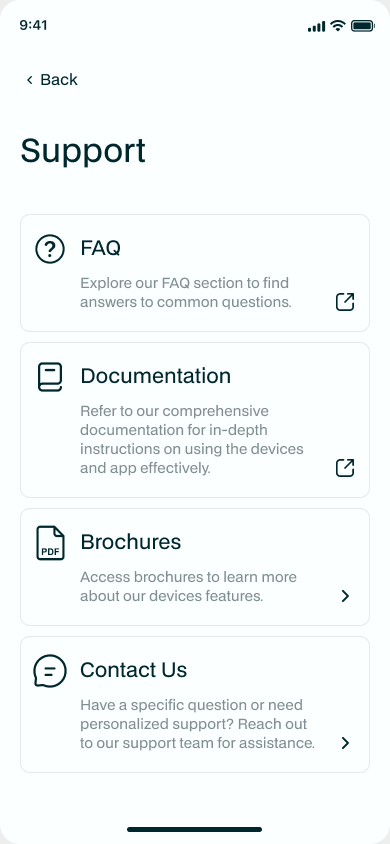
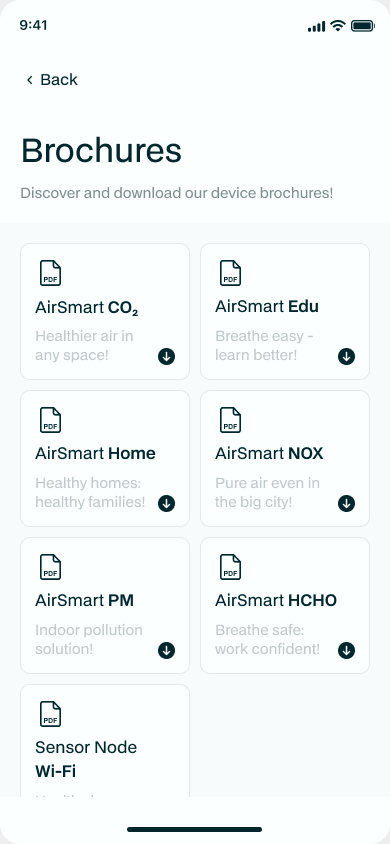
Your Product Brochure
We've done away with bulky printed manuals - better for the planet, and they're always out of date the moment they're printed. Instead, every AirSmart product has its own brochure: a friendly, plain-English guide to that device and how to read it. Download the one for your product any time from our website at https://www.monkeytronics.co.nz, or grab it straight from the app under Settings → Support → Brochures.
Installation
Placement
Your AirSmart monitor should be attached to an interior wall away from windows or drafts. Be careful not to place it in direct sunlight as this will affect the readings. For best accuracy, it should be placed between 1.2 m and 1.8 m above floor level. Make sure the air slots and sensors are not obstructed. You'll need to locate the monitor near a power outlet. N.B. The power cable has been rear fed in the following image. Consider placing it where it is clearly visible to students. AirSmart has been purposely designed to be silent and have a clear but unobtrusive visual readout. We want to give you the information you need, but not interrupt the lesson.
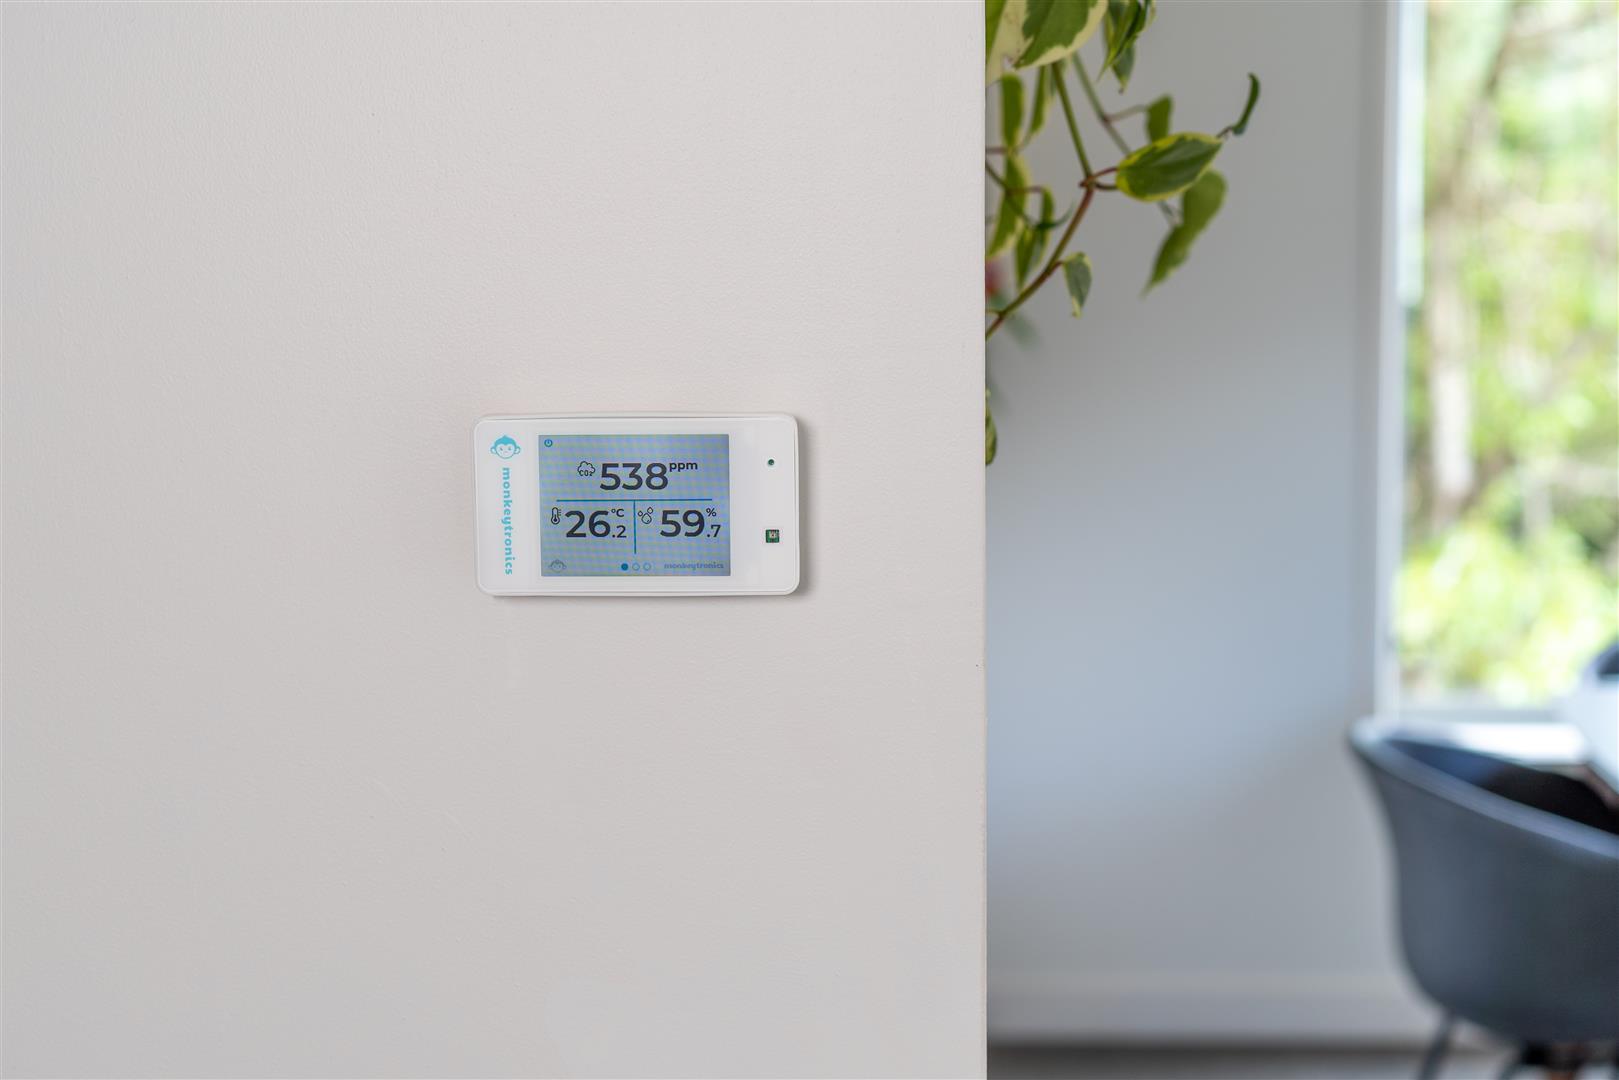
Figure 2 : Wall Placement
Fixing
AirSmart attaches to the wall with 2 screws (supplied), placed in a vertical line 35 mm apart. Before putting the monitor in place, loosen the anti-tamper bolt on the bottom and ensure that the USB cable is connected. Locate the monitor onto the screws and lower it into place. Tighten the anti-tamper bolt again. The unit is now securely attached to the wall, and the USB cable cannot be removed at the device end.
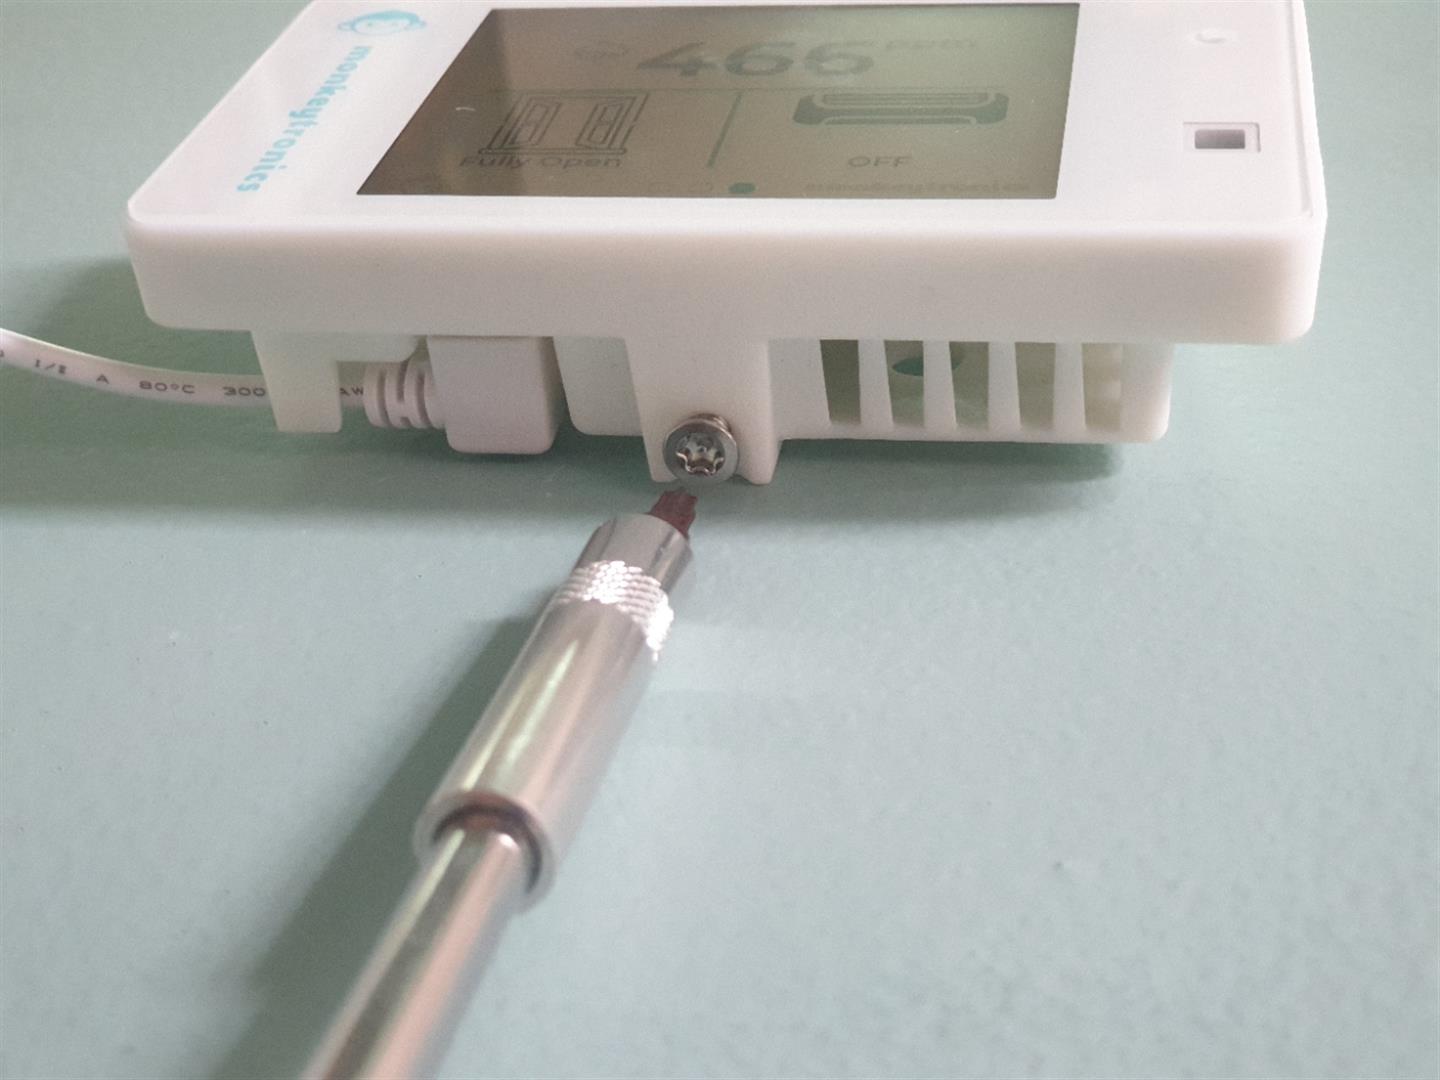
Figure 3 : Anti-tamper & security screw
Features
| Feature | Details |
|---|---|
| Connectivity | Wi-Fi |
| Power | Micro-USB (5 VDC) |
| Measurement Interval | less than 5 seconds |
| Physical Dimensions | 11cm x 7cm x 3cm |
| Mounting | Wall mount (with anti-tamper) |
Specifications
| Measurement | Operating Range | Units | Accuracy |
|---|---|---|---|
| Relative Humidity | 0 - 100 % | % | 3.0 % |
| Temperature | 0 - 80 °C | °C | 0.3 °C |
| Carbon Dioxide | 400 - 10,000 ppm | ppm | 3.0% + 30 ppm |
| Luminous Intensity | 0 - 10,000 Lux | Lux | 5.0 % |
| Sound Levels | 129 dB SPL | dBA | 1 dB |
| Reverberation | 0 - 10,000 ms | ms | tbd |
Mobile App
Download the App
The app can be downloaded from the Play Store or App Store, depending on where you stand on Android versus Apple. Monkeytronics provides both.
PRO TIP
Use the QR code on the quick start guide to download the app
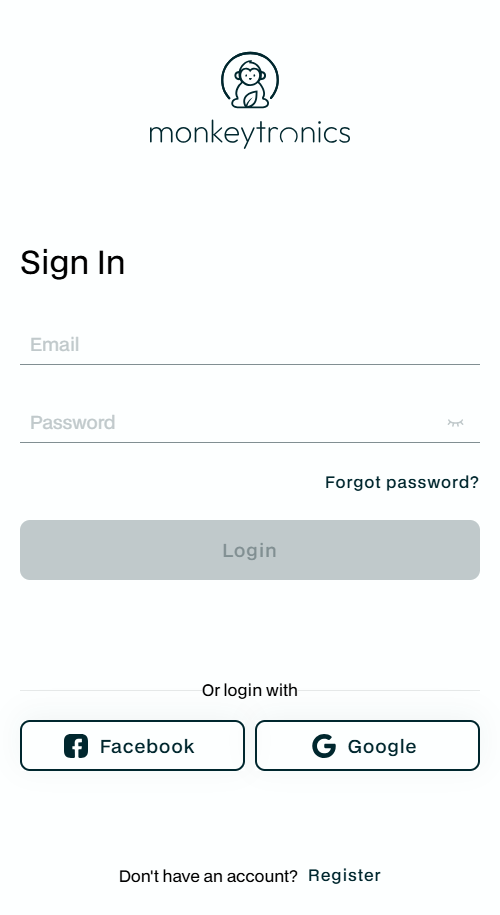
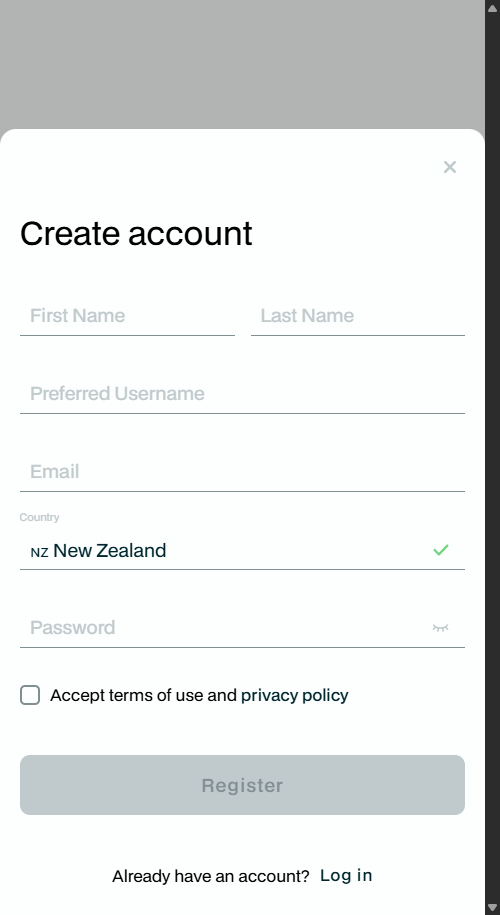
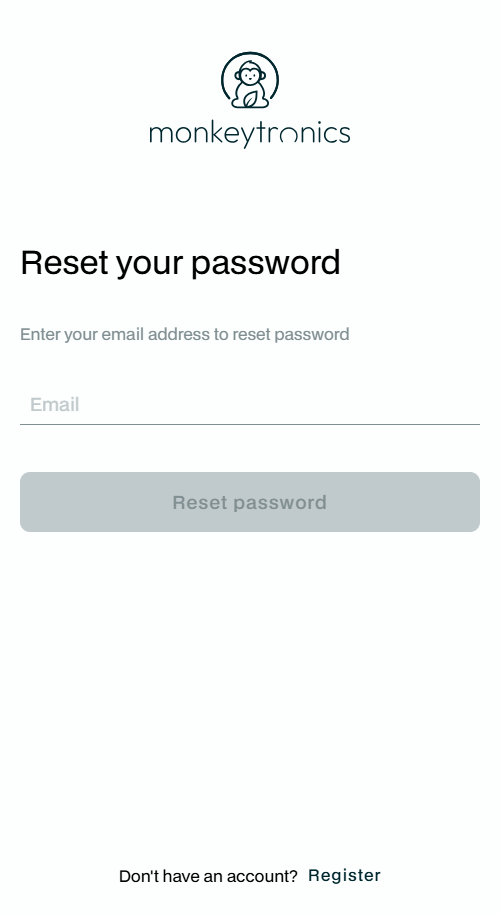
Register An Account
The first time you open the app you'll see the splash screen and then the sign-in page. Tap Register and provide your name, a username, your email address and a password. If you ever forget your password, no worries - just use the Forgot password? link on the sign-in page to reset it.
Add Your First Device
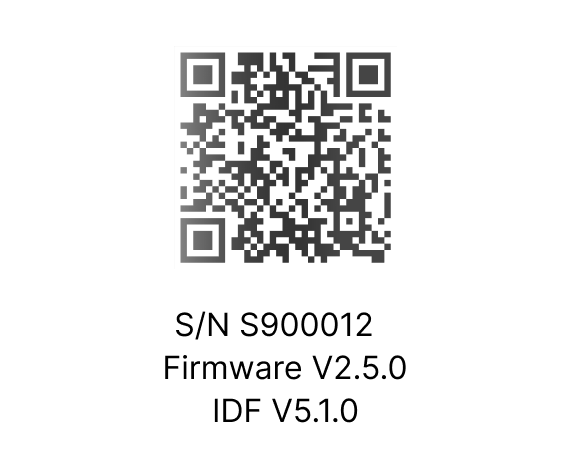
Once you've signed in, you can register your first AirSmart monitor. On the Devices tab, tap the + button to start the Add Device wizard. It's three simple steps: scan the QR code (on the monitor or the box it came in), customise the device (name, classroom, school and group - the fields with a little star are required), and success! If everything goes well, the app will then offer to connect the device to Wi-Fi.
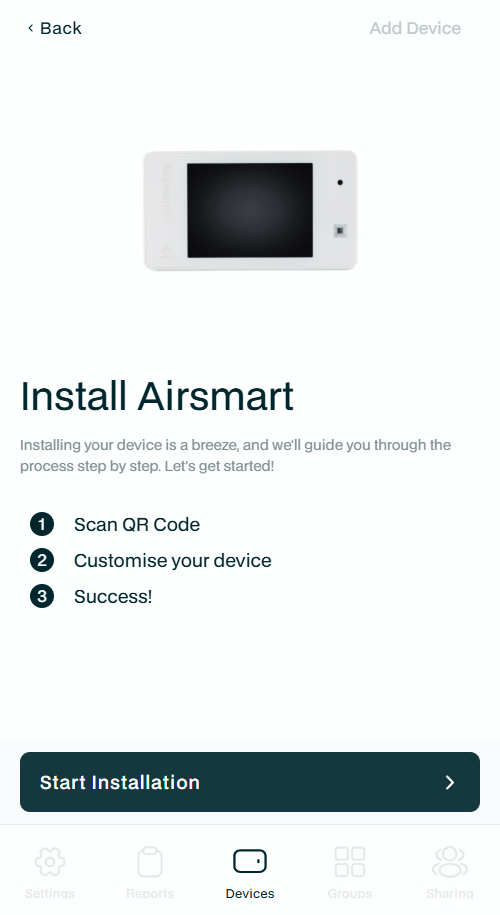
Figure 5 : The Add Device wizard
tip
This is the quick path to getting your first monitor online. For the full tour of the app — sharing, groups, notifications, reports and more — see the App Reference.
Connect to Wi-Fi
Wi-Fi Connection Wizard
After you've registered your device, the app offers to connect it to Wi-Fi. (You can also start this any time from the device menu - tap the device name, then choose Wifi.) The app will first ask you to put the monitor into pairing mode: press and hold the red button on the back of the device for a few seconds. The device will restart and open a secure Bluetooth channel, with a clear indication on the LCD display. Tap OK, and the app will connect over Bluetooth, scan for nearby networks, and let you pick yours and enter the password. If anything goes sideways, just press and hold the red button again to start a fresh pairing session and try again.
PRO TIP
Once it succeeds you'll see a confirmation in the app. Occasionally the conversation between the device and your phone finishes early - if so, check that the little Wi-Fi icon has appeared in the top-left of the LCD to confirm it worked.
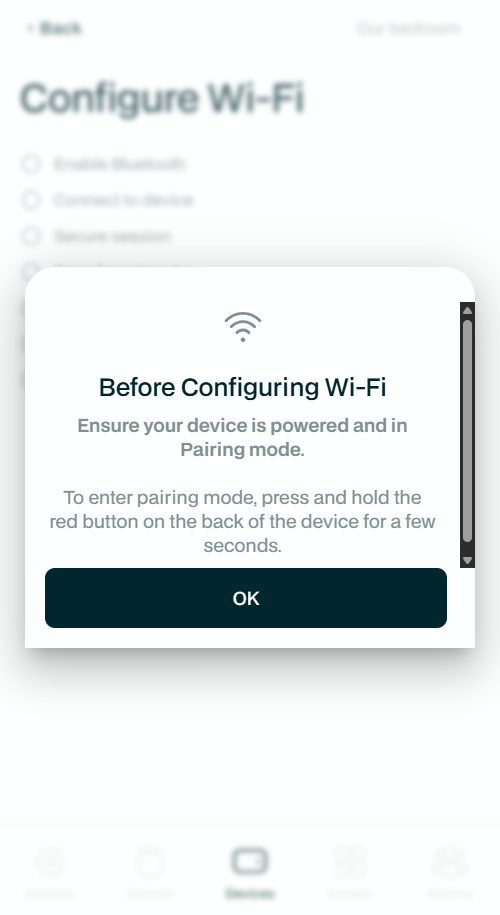
Figure 6 : Putting the monitor into pairing mode
Changing / Updating your Wi-Fi Connection
If you need to repeat this in the future, or move to a new Wi-Fi network - no problem. Tap the device on the Devices tab, open the device menu, and choose Wifi to run through the wizard again.
AirSmart Web Portal
In addition to the mobile app, Monkeytronics also provides a full featured Web Portal. This was designed to enable schools with a large number of devices to manage their fleet of devices and quickly filter and report on them to get maximum value from their data.
The web portal is available as a complete stand-alone alternative to the mobile app. However, in order to add new devices to your account, you do need to use the mobile app. This is because we use QR code scanning to register the device's Porting Authorisation Code (PAC), and we also need to communicate directly with the device over Bluetooth LE as part of the Wi-Fi provisioning process.
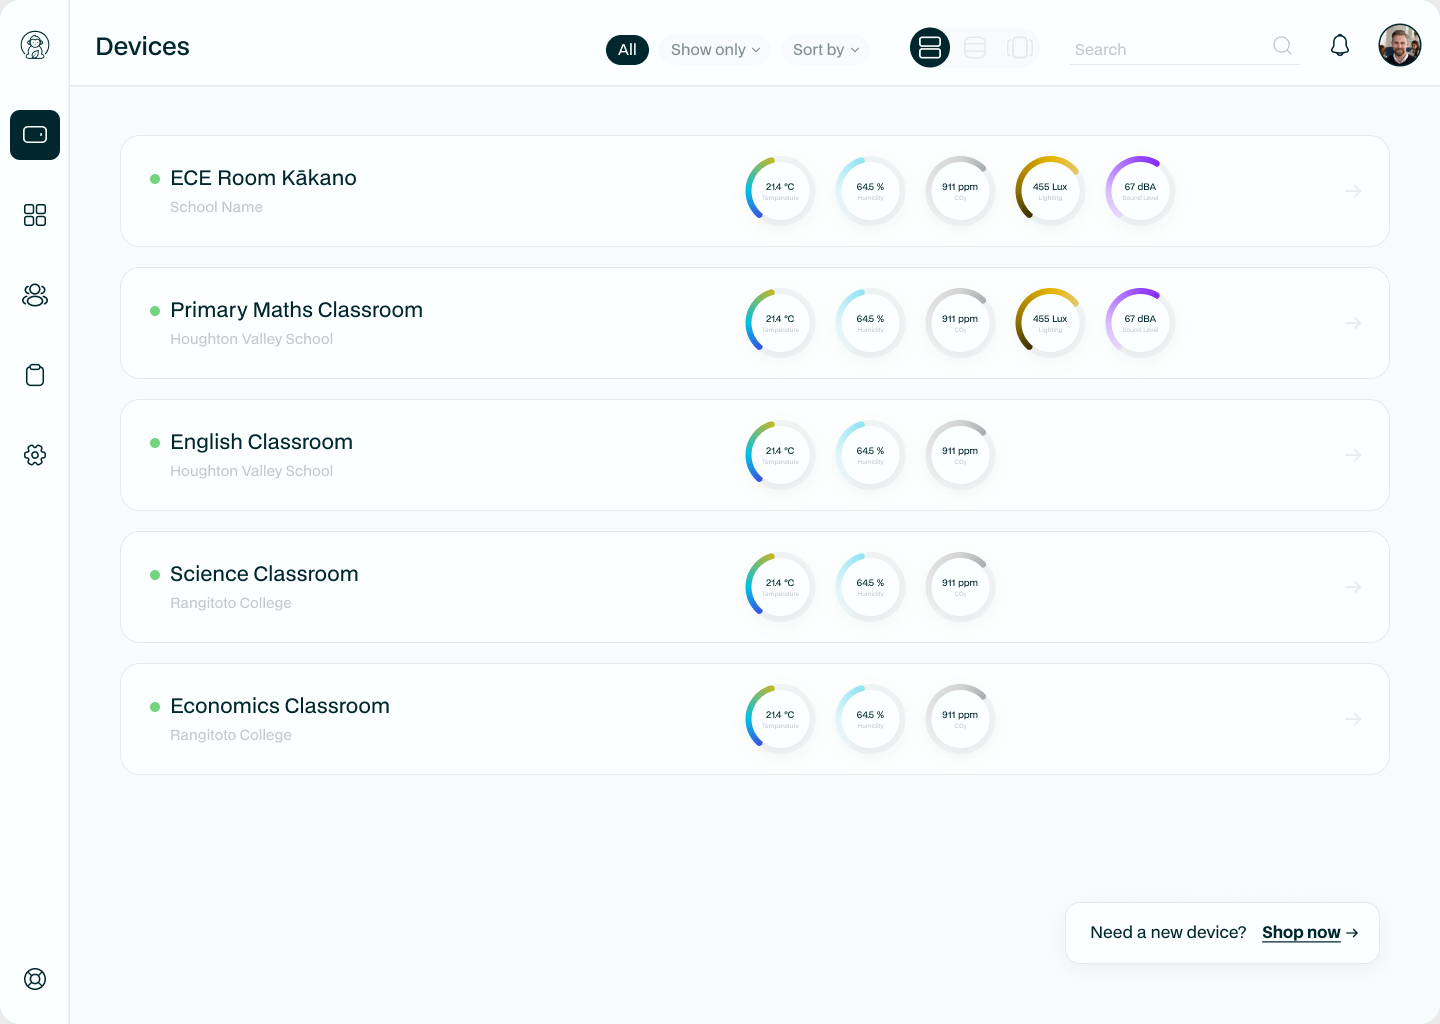
Figure 7 : Web Portal
PRO TIP
The AirSmart Web Portal is available on any browser at https://data.monkeytronics.co.nz
Trouble Shooting Connectivity Issues
We want you to get the absolute best out of your air quality monitors. So from time to time, someone from the Monkeytronics team or from the awesome Ministry of Education team may reach out to you to let you know when one of your monitors has gone off-line. In this case, you can follow the simple steps here to figure out what is wrong.
It's Not Plugged In
9 times out of 10, you'll find that it's been unplugged! If this is the case, it's a really great idea to put a bit of tape over the switch and maybe a little sticker to tell students and occasional staff not to switch them off.
Further Investigation!
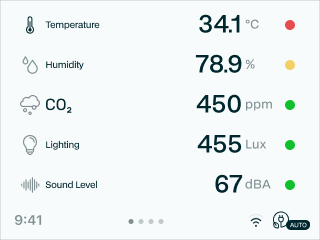
Let's check if your device is connecting properly by looking at the little Wi-Fi icon on the device screen. It works just like the Wi-Fi icon on your phone: full bars mean a strong connection, fewer bars mean a weaker signal, and greyed-out bars with a line through them mean the device is not connected to your network at all.
If the signal is weak, try moving the monitor a bit closer to your Wi-Fi router (or vice versa). If it shows as not connected, work through the steps below. Occasionally a monitor drops off the network for a little while on its own and comes back - so long as it isn't off-line for more than a day or so, that's usually nothing to worry about.


Switch it Off and On Again
If your monitor is not connecting, don't worry! Let's check a few things. First: switch it off and on again at the mains switch. You should see the following boot sequence:

Working Correctly
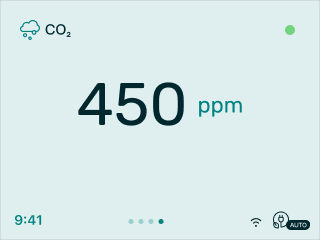
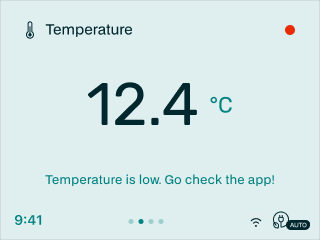
Once the device has finished booting up, it should start reporting sensor data. It will cycle through a few screens:
Wi-Fi Configuration Not Done Properly
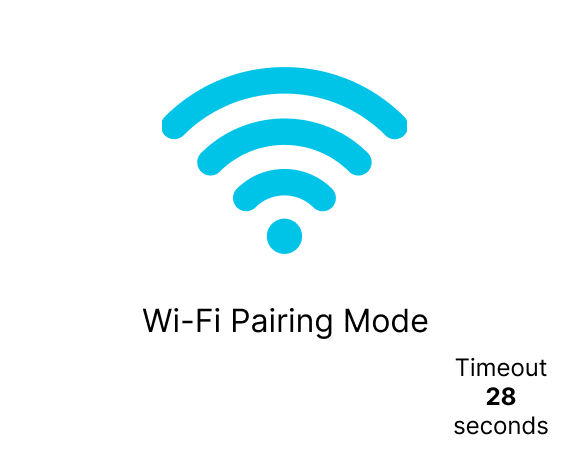
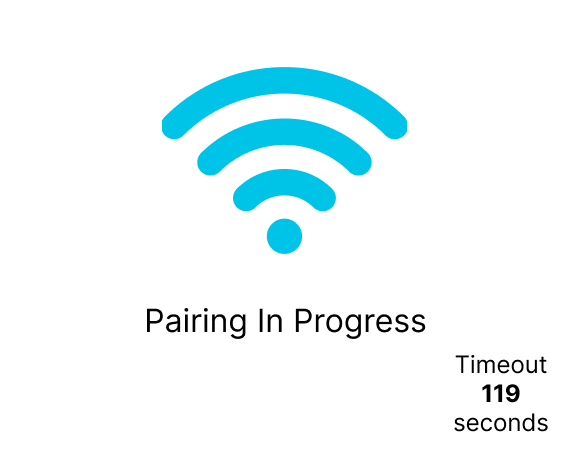
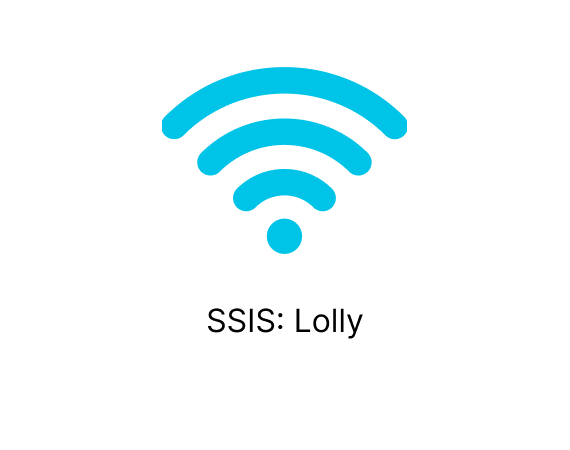
If the monitor never made it onto Wi-Fi, you'll see the pairing screens instead of live data. That's your cue to run through Wi-Fi setup again (or get in touch with your installer). When pairing is underway, the device shows a big Wi-Fi symbol and counts down a timeout while it waits for your phone:
Get Help
If you would like to report an issue or a bug, you can do this directly at the Service Desk : https://service-desk.monkeytronics.co.nz
Lastly, if you're still stuck, just get in touch! You can email us at support@monkeytronics.co.nz. We'd be happy to support you over email, phone or video call.